Understanding how to build Custom Service Descriptors using the Airflow CSD as an Example
A Custom Service Descriptor (CSD) is one of the easiest ways to add a service within the Cloudera Manager. The ability to create your own CSD’s opens up many opportunities for organizations to utilize Cloudera Manager more effectively. Let’s discuss CSDs in more detail and understand how to build a CSD for third-party services using the Airflow CSD as an example.
What is a Custom Service Descriptor?
A CSD is a file that contains all the configurations needed to describe and manage a new service in Cloudera Manager. A CSD is a very useful tool for a Hadoop cluster administrator.
Advantages of CSDs
-
CSDs help us easily manage the various versions of the services based on the requirement.
-
There’s a lot of convenience in developing CSDs for many services that are used in the Hadoop cluster
-
They provide ease of managing the service from a single user interface for an entire Hadoop application
Need for CSDs
Parcels were introduced as a mechanism to distribute the software across a Hadoop cluster, but it did not allow management of the processes. Hence, CSDs were introduced to provide us the ability to add our own managed services in Cloudera Manager. Services added using CSDs will show up in Cloudera Manager just like other services, e.g., HDFS, Yarn, HBase. Using CSDs for third-party services, we can leverage the features of Cloudera Manager such as monitoring, resource management, configuration, etc.
Structure of a CSD
A CSD is linked to one service type in Cloudera Manager, packaged and distributed as a jar file. It contains three folders: description (which is required), image, and scripts. You can learn more here.
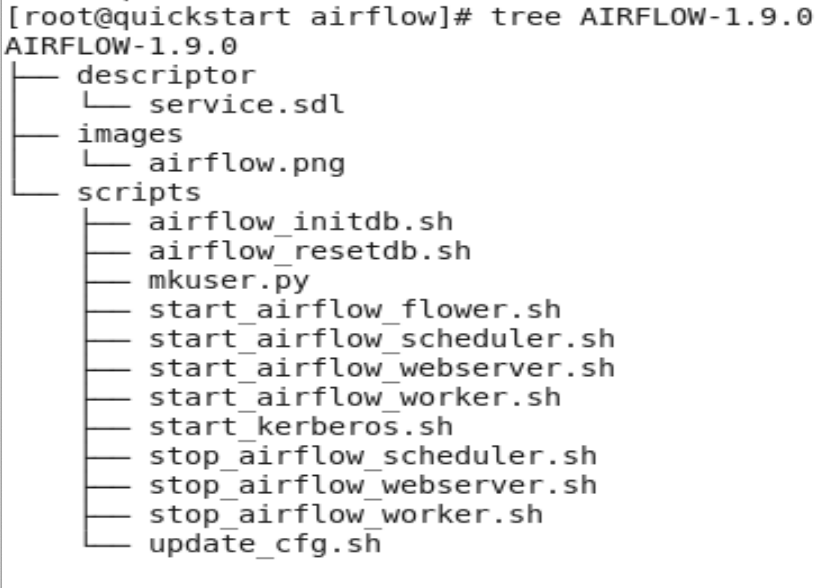 Example structure of Airflow-1.9.0.jar
Descriptor is the only required directory in a CSD. It contains the service.sdl file, which defines the configuration parameters of the service and the roles that the service will run. This file also defines the commands that may be used on the service or the role.
Images contain an icon used by Cloudera Manager to represent the service.
Script is a directory that contains all the control scripts that are necessary to perform any role-specific and service-specific commands. For example, stop_airflow_webserver.sh is used by the webserver role to stop the Airflow Webserver from running on a host.
Roles in a Service
Each service in Cloudera Manager has a set of Daemons or Processes assigned to a host machine in the cluster. Knowing about the daemons that will be part of a service is crucial in building a CSD.In Airflow, the Daemons that make it up are the Webserver, Scheduler, Worker, Flower, and Airflow Kerberos. All of these are collectively referred to as the roles in the Airflow service. Out of these roles, the Webserver, Scheduler, and Worker roles are required for the smooth and successful running of an Airflow cluster. You can learn more here.
Both services and roles may have commands and configuration parameters assigned to them. Service command is typically a command that affects every role within a service instance. For example, in the Airflow CSD, initializing the database is a command that will affect every role in Airflow. All the roles require a service configuration parameter. For example, db_hostname, db_hostname, broker_url, executor_type, etc., are required to create the airflow configuration file to connect and initialize the database successfully.
Specific role commands and parameters only pertain to a single role within the service. For example, in the Airflow CSD, it makes sense for the Webserver role to be initialized using start_airflow_webserver.sh. Similarly, every role’s parameter will be specified as required by the particular role.
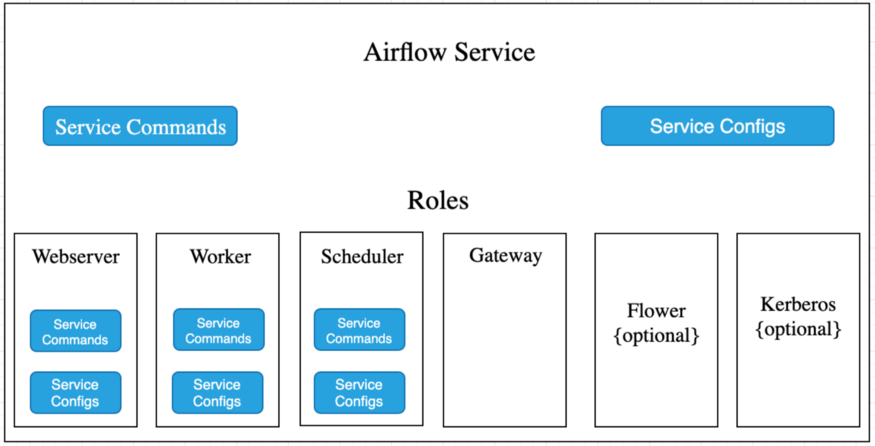 Airflow Service CSD
Gateway is a special type of role since they aren’t a server or daemon. Gateway roles enable Cloudera Manager to install and manage client configurations on that host. Assigning a Gateway role to the host will allow client configurations for the service to be deployed to that host. You can learn more here.
Roles implemented in the AIRFLOW CSD
Webserver, Scheduler, and Worker are the required roles in the Airflow service. Parameters specified in the CSD include a script-runner attribute to execute the start script of every role, stop-runner to execute the stop script of every role, respectively, and set environment variables for smooth execution of the script. Roles also have commands specified in the CSD, a script that gets executed on the host.
Gateway role needs an alternative object specifying link-root attribute to link the client configuration files. Using script-runner update_cfg.sh is executed, which helps us update the host's client configuration before the service deployment. Cloudera Manager sends the configuration files specified in the gateway config_writer during the deployment process, i.e., airflow_temp.cfg to each gateway role host.
To learn more about the parameters of the above roles please refer to service.sdl.
Validation of service.sdl
The service.sdl file can be validated with the validator.jar file. To run a validation, run:
[root@localhost AIRFLOW-1.9.0]# java -jar
/home/cloudera/Downloads/validator.jar -s descriptor/service.sdl
Building a JAR file
After creating all the necessary files and scripts, you’re ready to build your CSD Jar. To build the CSD, you can run the following command inside the CSD Definition directory:
[root@localhost ~]# cd AIRFLOW-1.9.0
[root@localhost AIRFLOW-1.9.0]# jar -cvf AIRFLOW-1.9.0.jar *
Steps to deploying a CSD
-
After creating the .jar file, copy it to /opt/cloudera/csd/ location
-
Check if the parcel is distributed and activated in the cluster
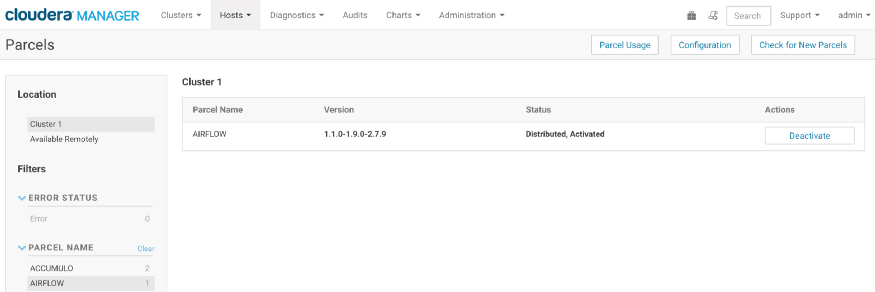 Example: Airflow parcel distributed and activated
 -
After the parcel is activated, restart the Cloudera Manager service using the command: service cloudera-scm-server restart
-
You should now be able to the service listed in the Cloudera Manger’s Add Service list. We can then add the service in Cloudera Manager using the steps illustrated below
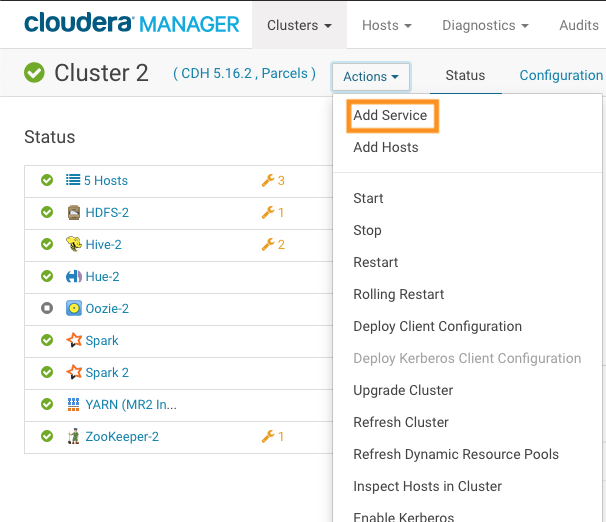 Click on Add service
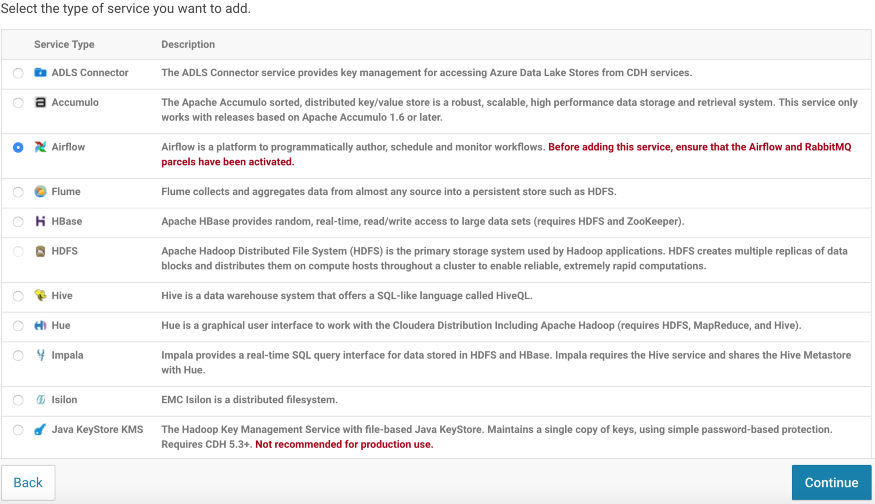 Select service to be added from the service list and click continue. Example: Airflow
 -
After adding the Airflow service, deploy the client configurations. Client configuration for the service will involve assigning the host for respective roles in the service and updating values for the configuration files
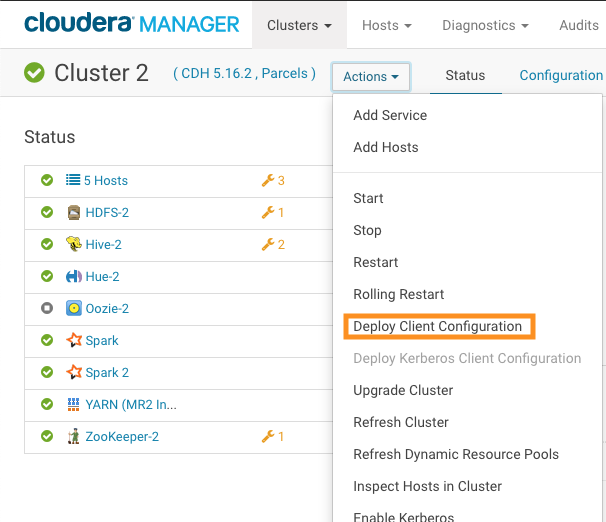
Click the option to proceed with client configurations
To know more about how to deploy the client configuration using the Airflow CSD and deploy an Airflow DAG, please refer to the Airflow CSD blog.
Manage a CSD
To update the version of a service, a CSD only requires deploying and activating the respective version of the services parcel in the cluster. The CSD will be active in Cloudera Manager and will require you to update the client configurations in Cloudera Manager.
To get the best data engineering solutions for your business, reach out to us at Clairvoyant.
Relevant Links
-
Cloudera CSD Documentation Wiki:
https://github.com/cloudera/cm_ext/wiki/CSD-Primer -
Cloudera CSD Structure Documentation Wiki:
https://github.com/cloudera/cm_ext/wiki/The-Structure-of-a-CSD -
Cloudera ADD-on -Services Documentation:
https://www.cloudera.com/documentation/enterprise/5-14-x/topics/cm_mc_addon_services.html -
Apache Airflow CSD Project in Github:
https://github.com/teamclairvoyant/apache-airflow-cloudera-csd