This blog talks about installing and deploying Confluent Platform 6.2.0 with ease using Ansible Playbooks on AWS EC2 instances.
We will be using a cp-ansible repository that provides the playbooks and templates that allow you to provision the Confluent Platform in your environment easily.
These playbooks will help you get a proof-of-concept cluster off the ground that is production-ready.
Specifically, this repository:
-
Installs Confluent Platform packages or archives.
-
Starts services using systemd scripts.
-
Provides configuration options for many security options including encryption, authentication, and authorization.
The services that can be installed from this repository are:
-
ZooKeeper
-
Kafka
-
Schema Registry
-
REST Proxy
-
Confluent Control Center
-
Kafka Connect (distributed mode)
-
KSQL Server
-
Replicator
This blog will walk you through the steps to follow to set up a 3 node Confluent Cluster using Ansible.
Prepare Environment
Environment: AWS
No. of nodes: 3
Linux: Ubuntu 18.04 LTS Bionic
1. Capture the Private IPv4 DNS
node1.confluent.com
node2.confluent.com
node3.confluent.com
In this blog, we will use simpler node aliases to better understand service distribution and commands.
For AWS environment, your name node will be something like below e.g.: ip-172–31–42–254.us-east-2.compute.internal
2. Create the hostlist in the root user in one of the hosts where we plan to install Ansible.
In our case, we have selected host — node1.confluent.com
cat HOSTLIST
node1.confluent.com
node2.confluent.com
node3.confluent.com
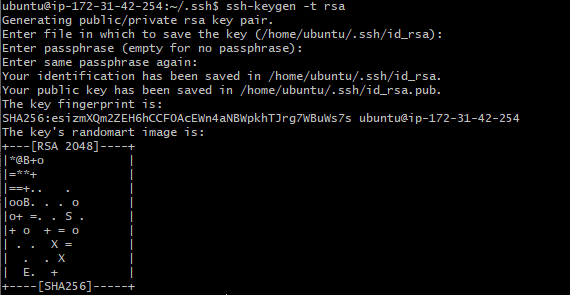
3. Setup Password-less ssh using user ubuntu
- Run the below to create the ssh key:
ssh-keygen -t rsa
- Copy the id_rsa.pub entry and append it in the authorized_keys of all the hosts part of the Confluent cluster. This will enable password-less ssh from the Ansible host to the other hosts.
- Verify the password-less ssh using the command below from the host
node1.confluent.com:
for HOST in `cat HOSTLIST`; do echo “*** $HOST”; ssh -qt $HOST
‘hostname -i’; done
(Type ‘yes’ if prompted)
4. Install git and OS dependencies on the Cluster nodes
- Login to the Ansible host (node1.confluent.com) and install git using
the below command (if git is not installed):
sudo apt install git
- Git deploy the “hadoop-deployment-bash”
git clone https://github.com/teamclairvoyant/hadoop-deployment-bash
- Run the below for setting up variables:
cd hadoop-deployment-bash
ln ../HOSTLIST
GITREPO=`pwd`
- Run the below for setting up the OS dependencies and prerequisites (The first set of commands below will securely copy the required script files and the second set of commands will run the scripts on all the nodes part of the HOSTLIST):
for HOST in `cat HOSTLIST`; do

echo “*** $HOST”

scp -p \

${GITREPO}/install_tools.sh \

${GITREPO}/change_swappiness.sh \

${GITREPO}/disable_iptables.sh \

${GITREPO}/disable_selinux.sh \

${GITREPO}/disable_thp.sh \

${GITREPO}/install_ntp.sh \

${GITREPO}/install_nscd.sh \

${GITREPO}/install_jdk.sh \

${GITREPO}/configure_javahome.sh \

${GITREPO}/install_jce.sh \

${GITREPO}/link_openssl.sh \

$HOST:

done

BOPT=”-x”
for HOST in `cat HOSTLIST`; do

echo “*** $HOST”

ssh -t $HOST “ \

sudo bash $BOPT ./install_tools.sh; \

sudo bash $BOPT ./change_swappiness.sh; \

sudo bash $BOPT ./disable_iptables.sh; \

sudo bash $BOPT ./disable_selinux.sh; \

sudo bash $BOPT ./disable_thp.sh; \

sudo bash $BOPT ./install_ntp.sh; \

sudo bash $BOPT ./install_nscd.sh; \

sudo bash $BOPT ./install_jdk.sh — jdktype openjdk — jdkversion 8; \

sudo bash $BOPT ./configure_javahome.sh; \

sudo bash $BOPT ./install_jce.sh; \
sudo bash $BOPT ./link_openssl.sh”

done
Installing Ansible on Ubuntu
- Login to the Ansible host node1.confluent.com Run the below commands to install Ansible on the host:
sudo apt update
sudo apt install software-properties-common
sudo add-apt-repository — yes — update ppa:ansible/ansible
sudo apt install ansible
- After successfully install, you can verify the Ansible installation using the below command:
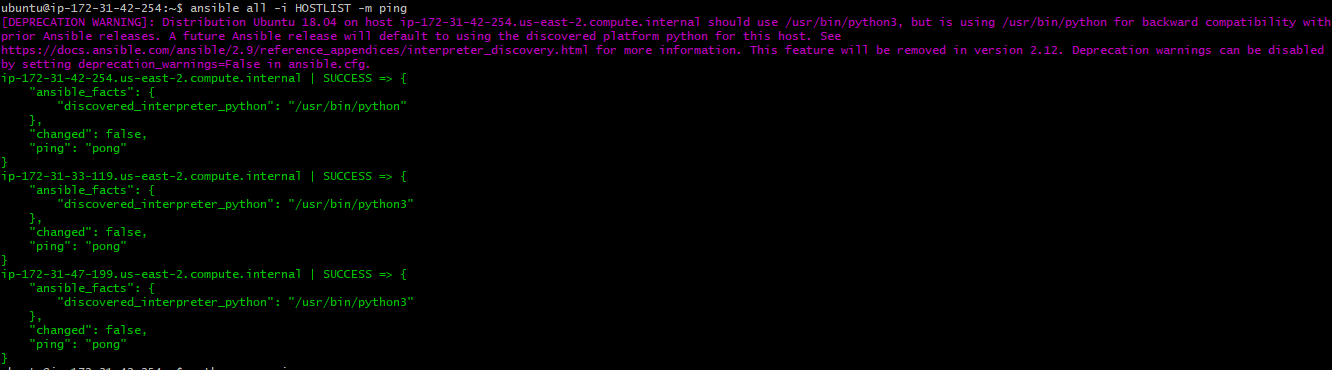
ansible — version
ansible all -i HOSTLIST -m ping

Download Ansible Playbooks for Confluent Platform
- Clone the Ansible Playbooks for Confluent Platform repo:
cd to the home directory of the ubuntu user and run the below command: git clone https://github.com/confluentinc/cp-ansible
- Check out the branch:
cd cp-ansible
git checkout 6.2.0-post
Note: Here we are installing the 6.2.0 version, so need to check out the specific version

Generate an inventory file
- Create the hosts.yaml file under cp-ansible directory as below: (Here SSL is set to enabled)
all:

vars:

ansible_connection: ssh

ansible_user: ubuntu

ansible_become: true
ssl_enabled: true

zookeeper:

hosts:

node1.confluent.com:

node2.confluent.com:

node3.confluent.com:

kafka_broker:

hosts:

node1.confluent.com:

broker_id: 0

node2.confluent.com:

broker_id: 1

node3.confluent.com:

broker_id: 3

schema_registry:

hosts:

node1.confluent.com:

kafka_rest:

hosts:

node1.confluent.com:

ksql:

hosts:

node2.confluent.com:

node3.confluent.com:

kafka_connect:

hosts:

node3.confluent.com:

control_center:

hosts:

node2.confluent.com:
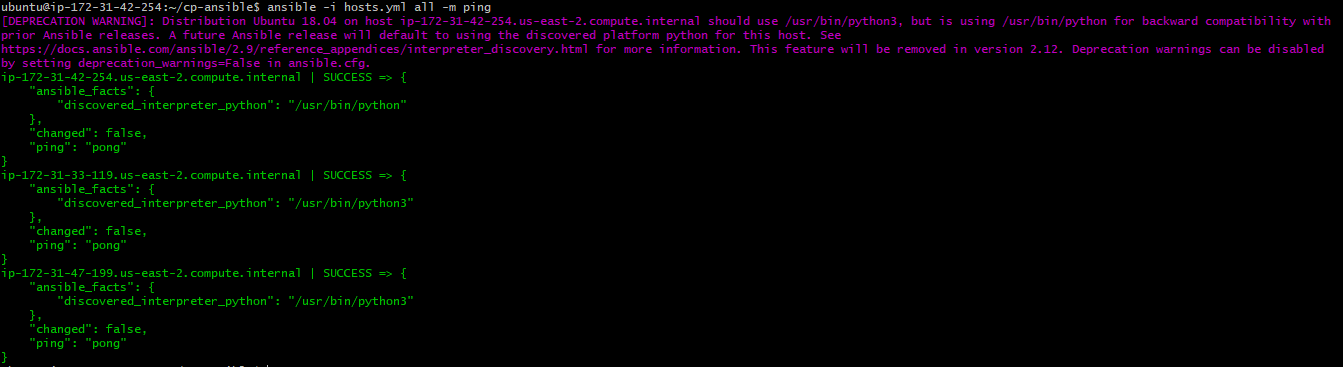
- Test the connectivity:
cd cp-ansible
ansible -i hosts.yml all -m ping
After your hosts.yml file is ready, to install or update all Confluent Platform components, run the all.yml playbook:
ansible-playbook -i hosts.yml all.yml
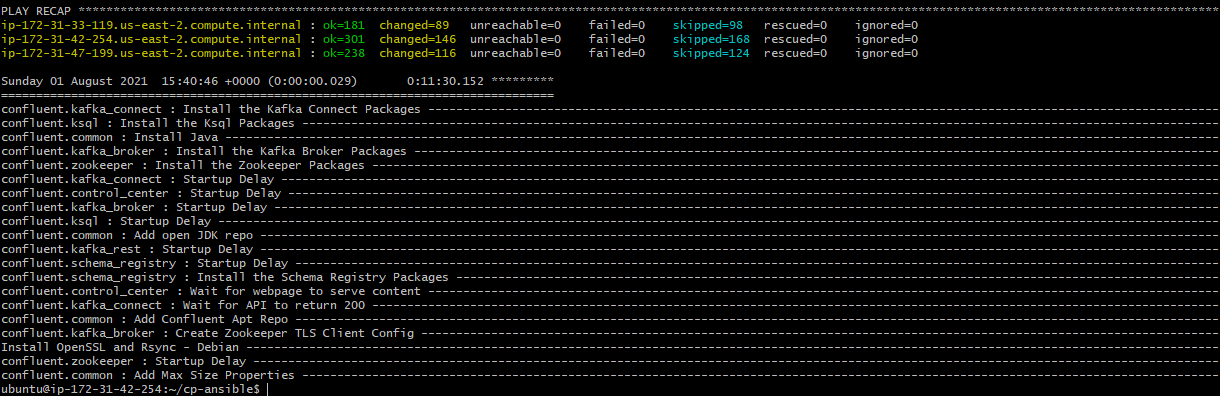
This shall take a few mins to complete and if all went well, it will display the output similar to above.
Now that the installation is complete, we can navigate to the Control Center UI using your favorite. browser (need to make sure the AWS security rule allows port 9021):
https://<Public IPv4 DNS address of node2.confluent.com>:9021/
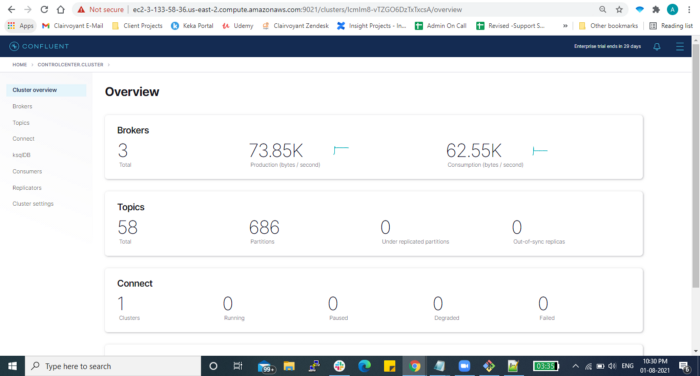
Your Confluent Platform 6.2.0 is now running!
Note: Since we have not used any license in the installation, the default installation will enable a Trial (Community) license which is valid for 30 days. A trial (evaluation) license allows a free trial of commercial features in a production setting.
More details on licensing are available at:
https://docs.confluent.io/platform/current/installation/license.html
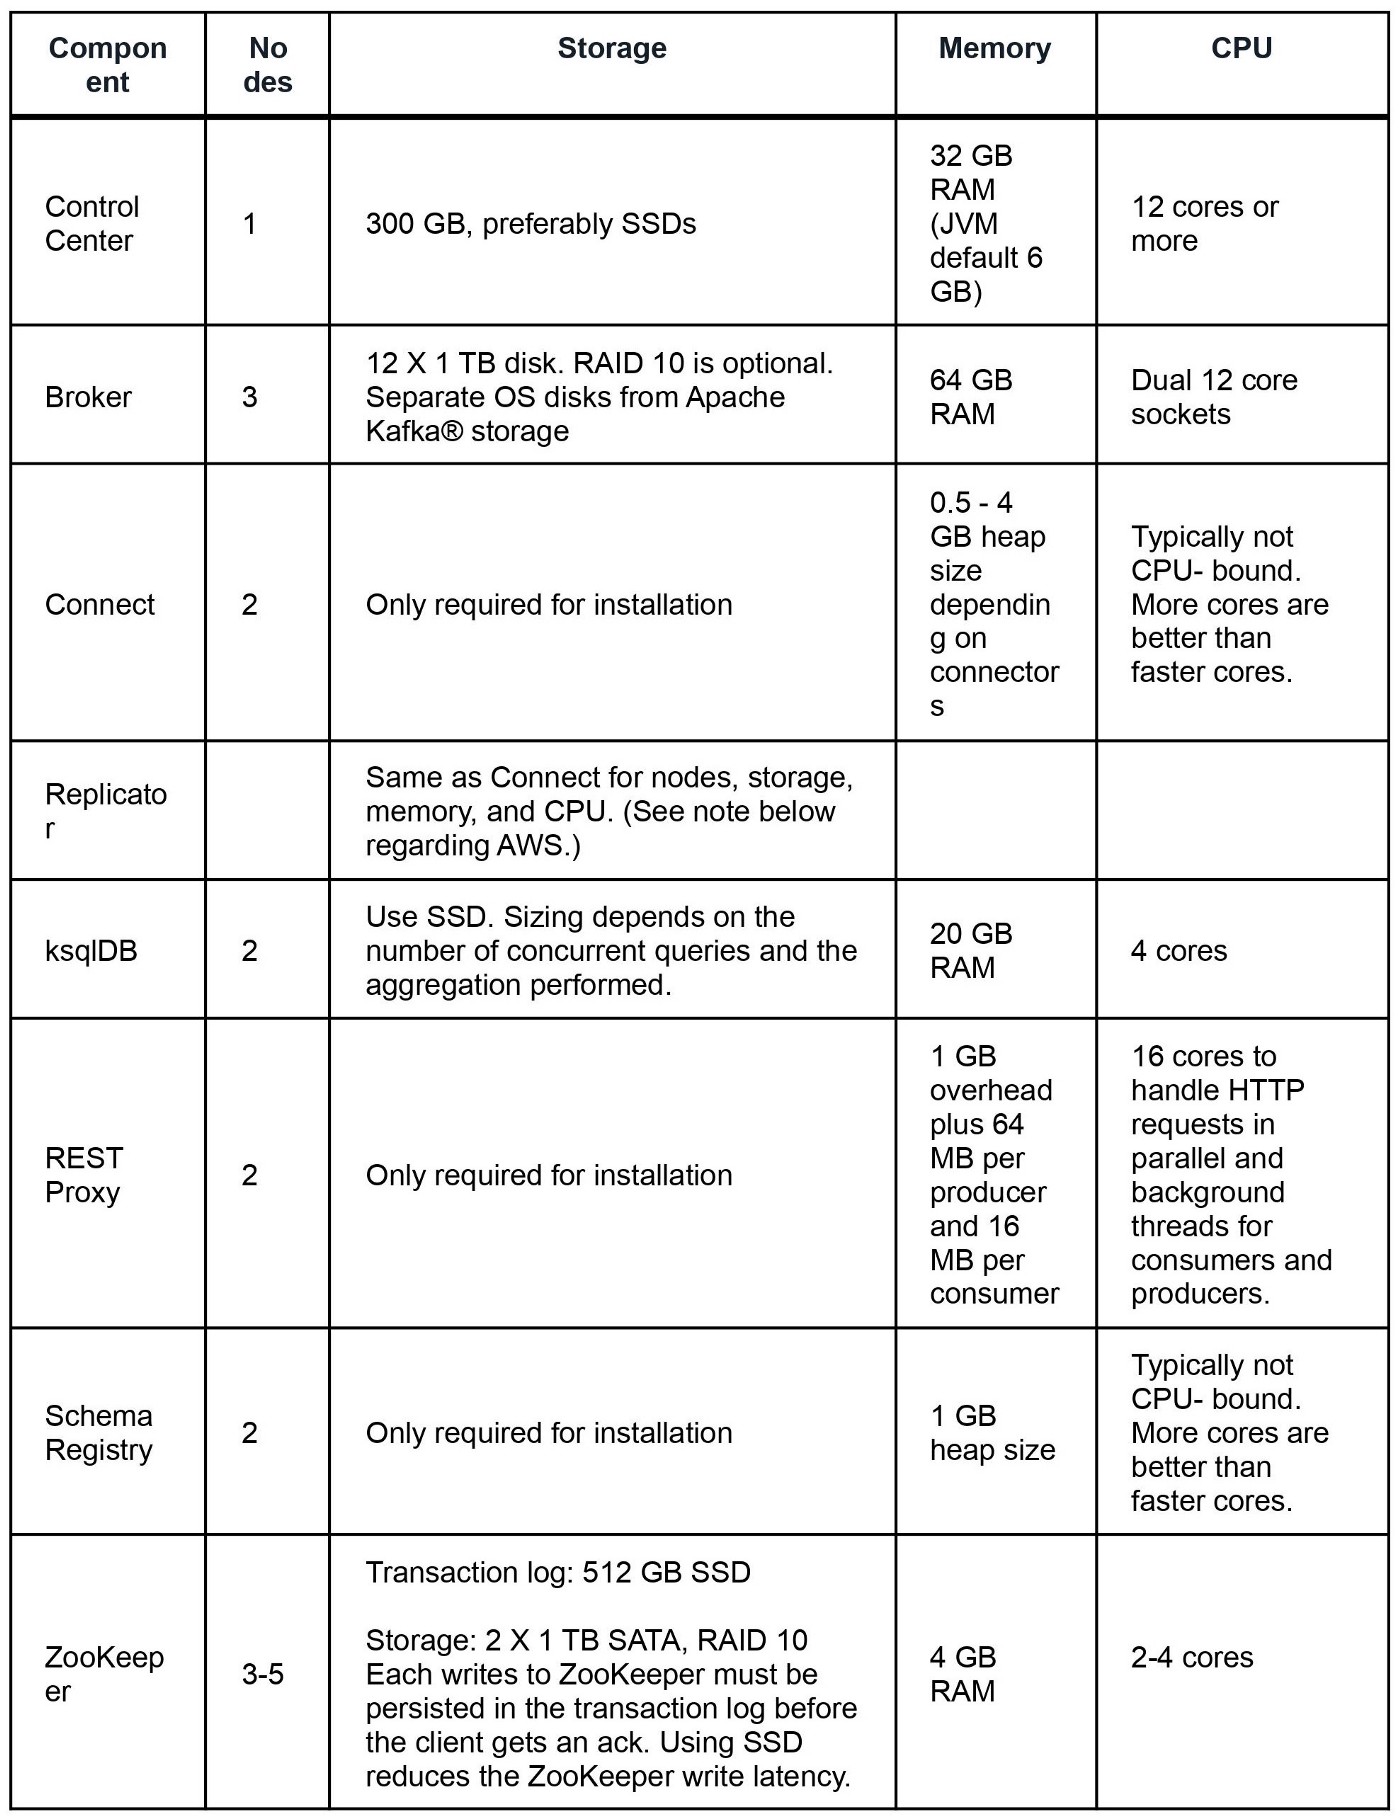
The above setup is for a POC kind of setup in terms of architecture, there are very specific considerations to make to run the Confluent Kafka platform in Production:
Reach out to us at Clairvoyant to get the best data engineering solutions for your business.