A Step-by-step installation guide to add Apache Spark service in Docker Container Cloudera Quickstart VM
Spark is one of the most popular projects under the Apache umbrella. To accommodate more and more developers who join the community every day, there have been several additions made to the infrastructural and API changes in the recent Spark 2 version. For the enthusiastic engineers who wish to make the most out of the new Scala, Python and Java APIs, this article is your guide to install Spark2 services on Cloudera Cluster.
Please refer to Docker, JDK, and CDH if your requisites are not met.
Installing CDS Powered by Apache Spark:
Environment :
1. Java version 8
2. Cloudera Manager 5.16
3. Cloudera Distribution Hadoop 5.16
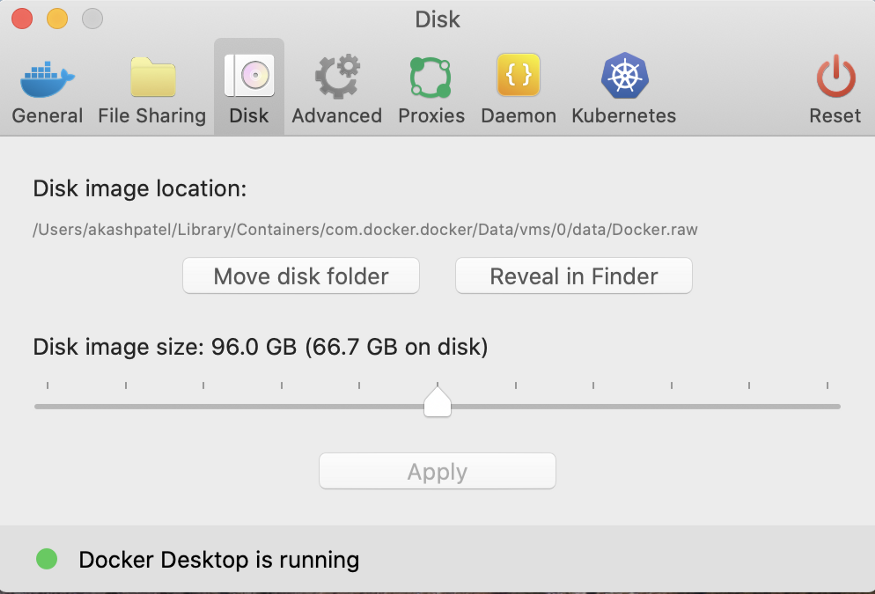
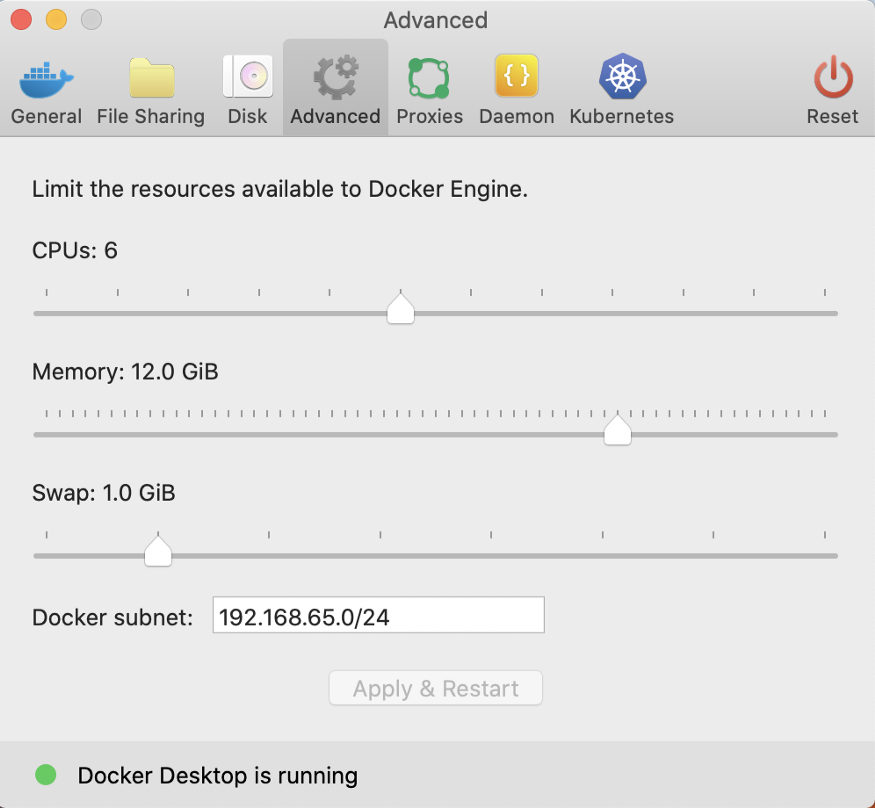
Note: I’m running Cloudera Docker Container for this blog, and here is the memory and storage allocation.
Adding the Spark2 Custom Service Descriptors
1. Switch to the root user account
2. Go to the directory “/opt/cloudera/csd” directory
sudo su
cd /opt/cloudera/csd
Now, We have several versions of Spark2 available. Please check this URL. For this blog, we intend to install 2.4.0.cloudera2, for which we will be using the following URL: https://archive.cloudera.com/spark2/parcels/2.4.0.cloudera2/
This command will download Spark2 Jar file to the “/opt/cloudera/csd” directory.
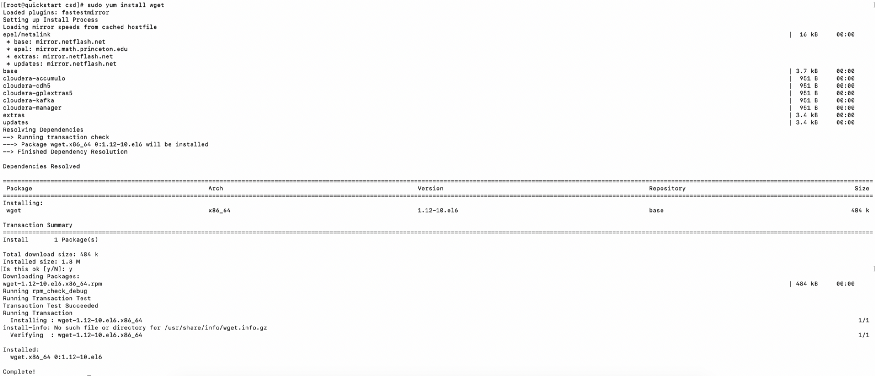
wget https://archive.cloudera.com/spark2/parcels/2.4.0.cloudera2/
3. Check the downloaded jar file, its ownership, and the owner groups as well.
ls -al
-
Change ownership and the ownership group of the downloaded jar file
-
Change the read permission of the downloaded jar file
chown cloudera-scm:cloudera-scm SPARK2_ON_YARN-2.4.0.cloudera2.jar
chown 644 SPARK2_ON_YARN-2.4.0.cloudera2.jar

4. Varify the permission and ownership of the Spark Jar file — First, second and third columns respectively.
ls -al

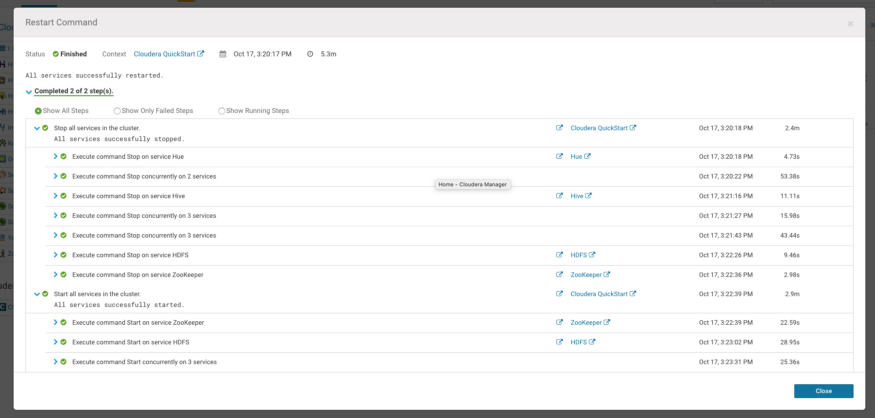
5. Restart the cloudera-scm-server.
service cloudera-scm-server restart

Adding Spark2 parcel in Cloudera Manager
Go back to http://localhost:7180/ on a Web Browser. (Note: since we restart CM services, it will take a few minutes)
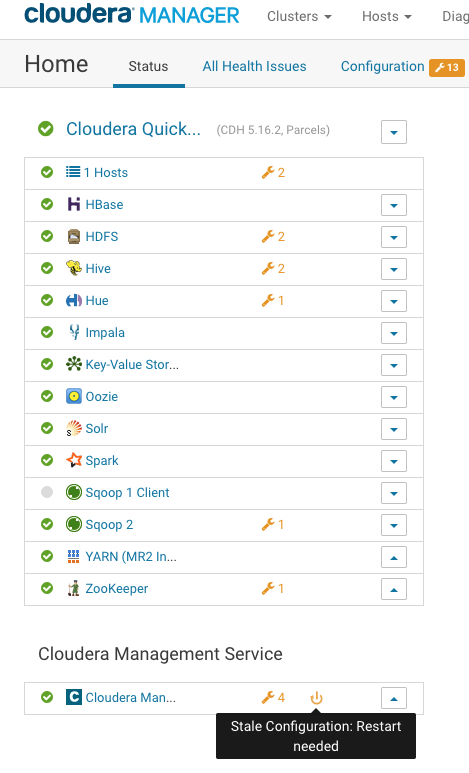
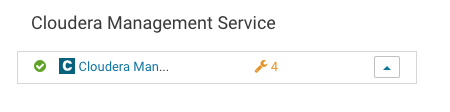
You will find Stale Configuration sign to deploy changes in the Current running Cluster using Cloudera Management Service. Click on the Stale Configuration icon.
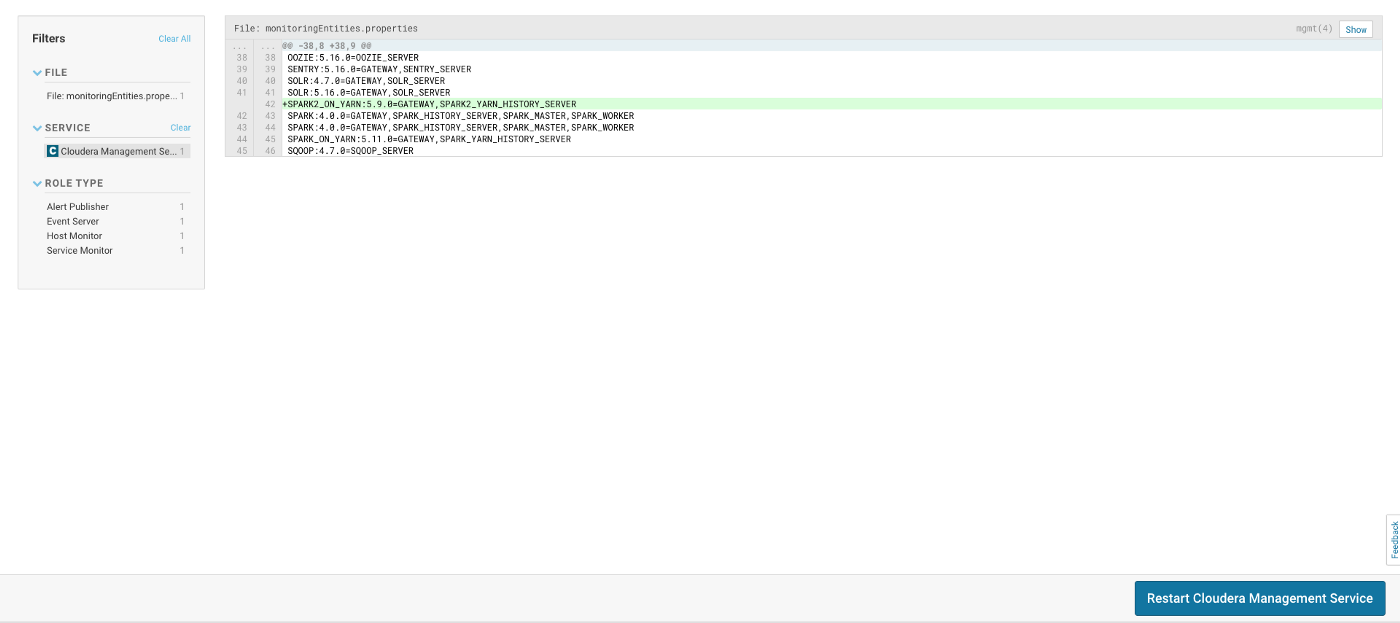
Check the MonitoringEntities.properties where the previous changes were added.
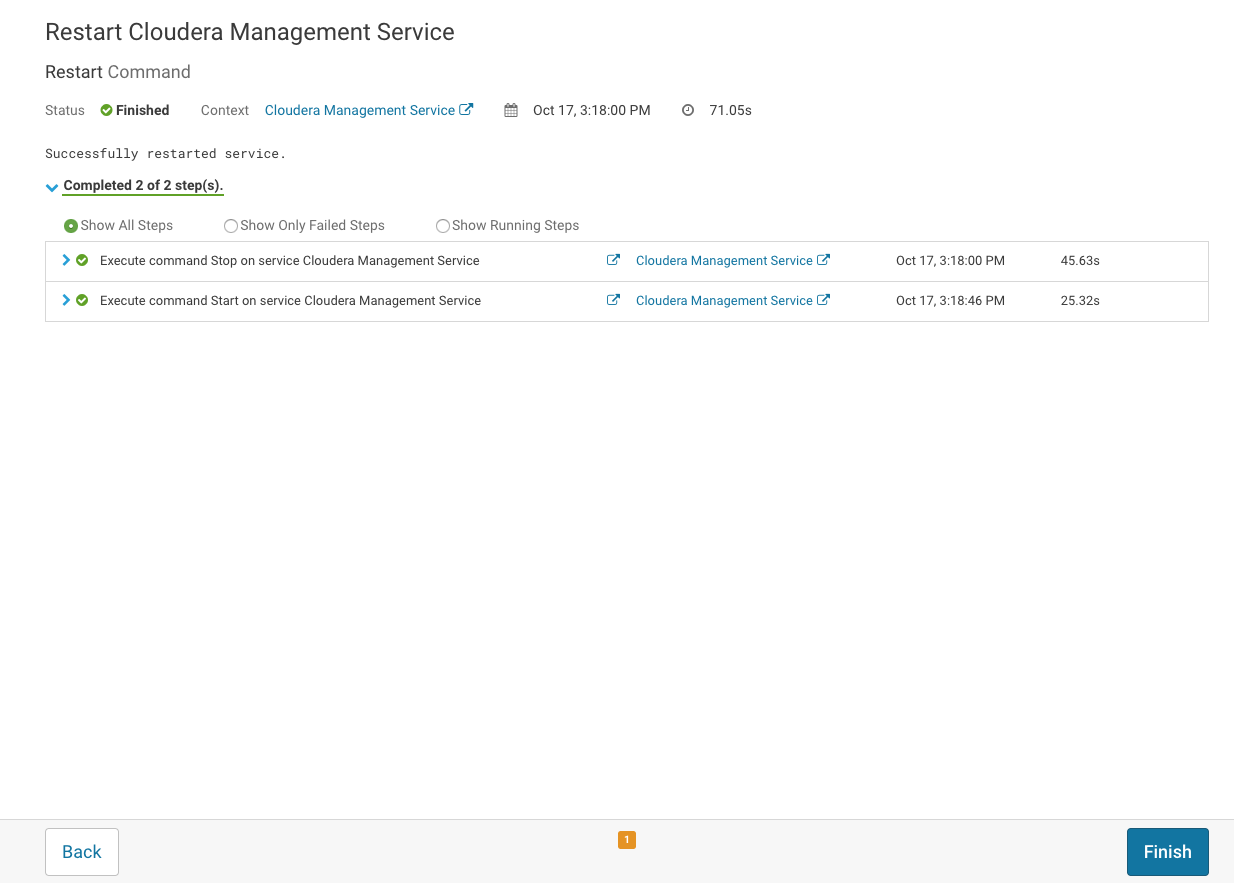
3. After the changes have been deployed, Cloudera Manager will be in Good Health.
Restarting the running services
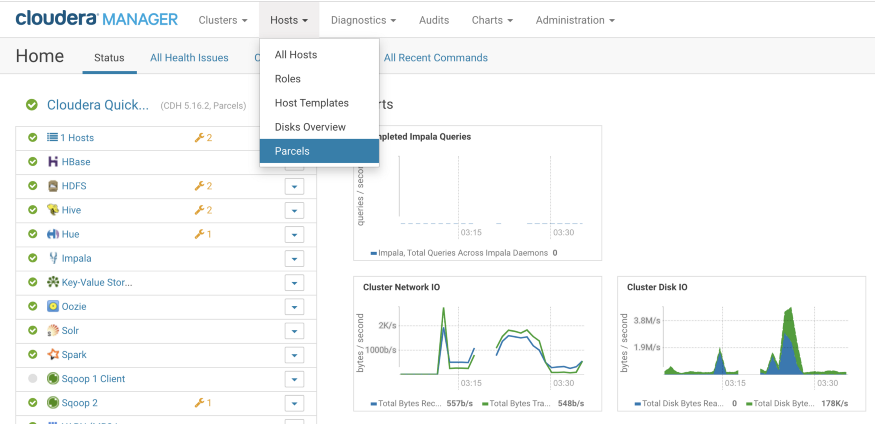
Once the jar file is available in the “/opt/cloudera/csd”, let’s add the Spark2 parcel.
To add, go to Home → Hosts →Parcels.
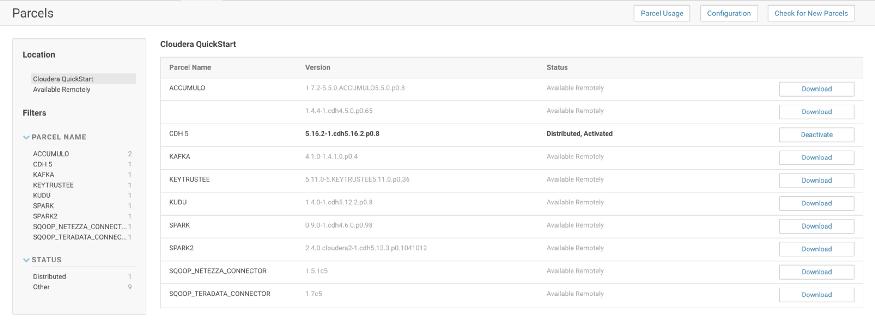
Download, Distribute and Activate the parcel
Under the list of Cloudera Cluster Parcels, you will find Spark2 Parcel’s name. Download it, Distribute it, and Activate it.
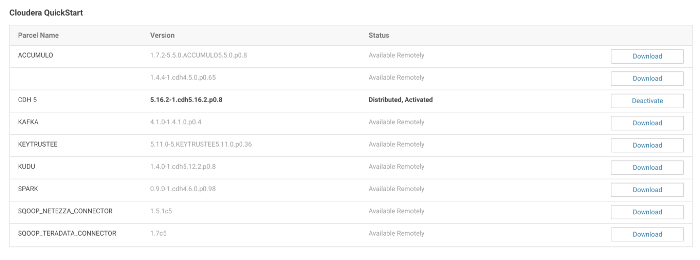
It will take a while.
Note: Please make sure that you have allocated enough space and memory for the docker without which it can throw an error at the downloading or distributing section.


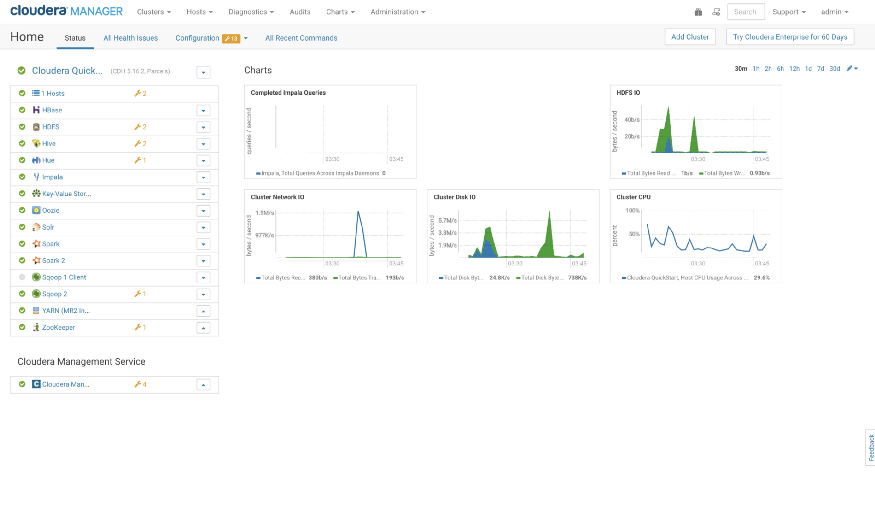
Verify that the Spark2 Service is activated.
Adding the Spark2 service to the Cloudera Cluster
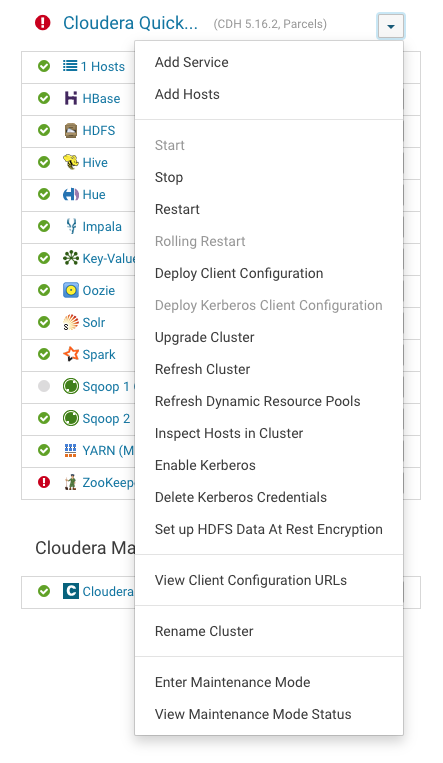
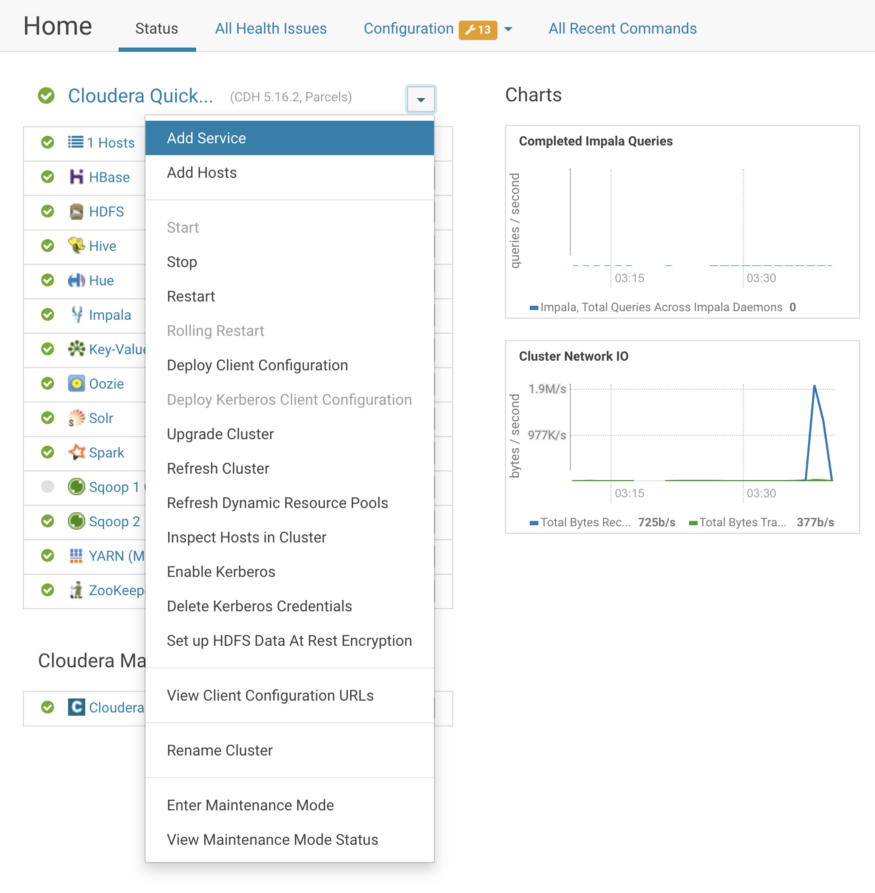
Go to Home → Cloudera Quickstart (Left Panel)→ Add service
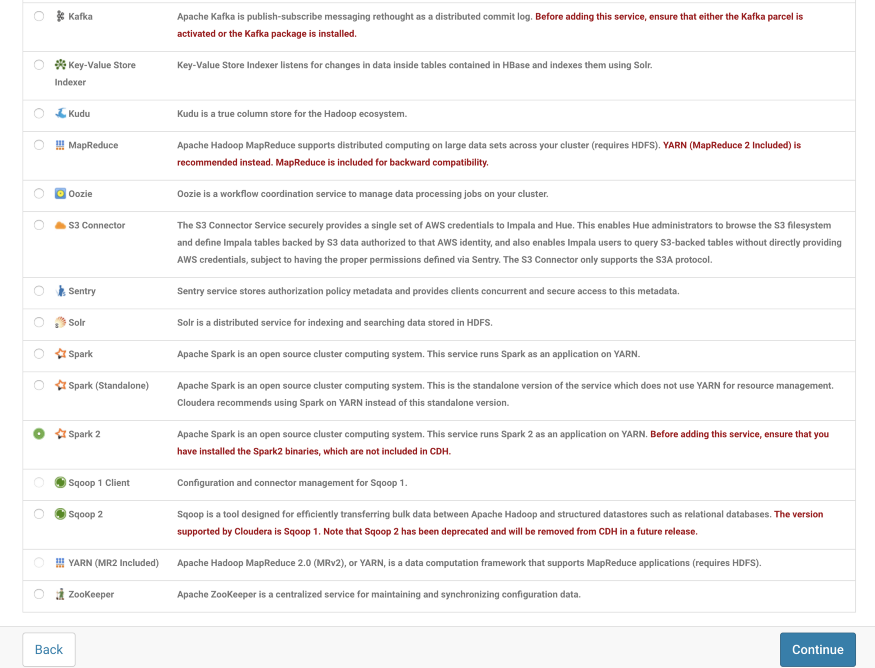
Find the Spark 2 service name. Select the Service and click on Continue.
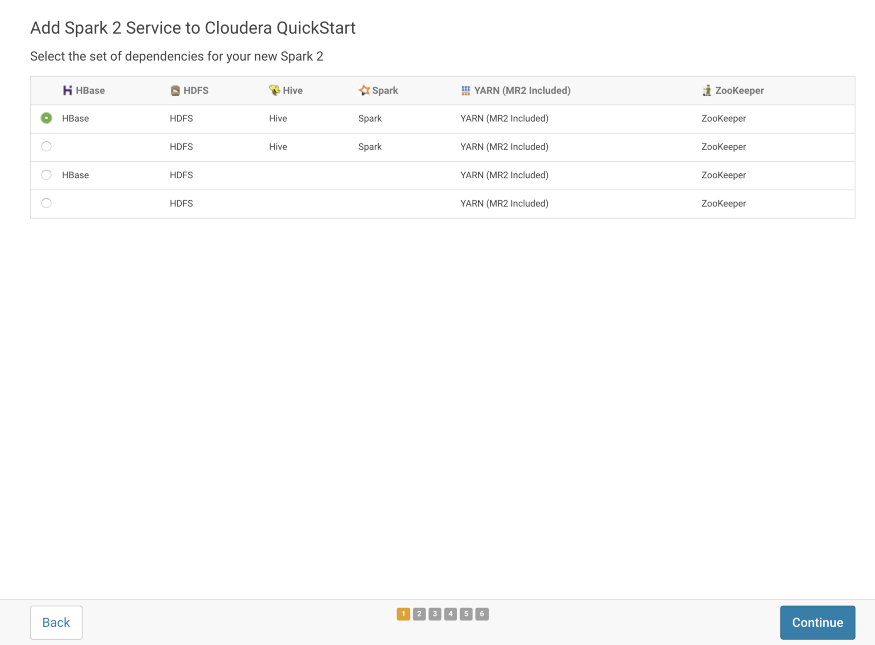
Since we want to work with HBase, HDFS, and Hive with Spark Dependencies, I have selected the first option.
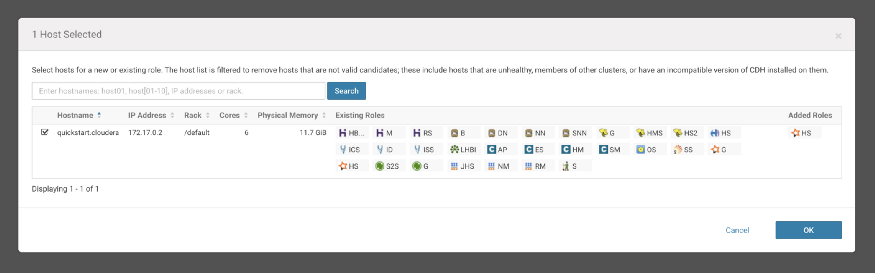
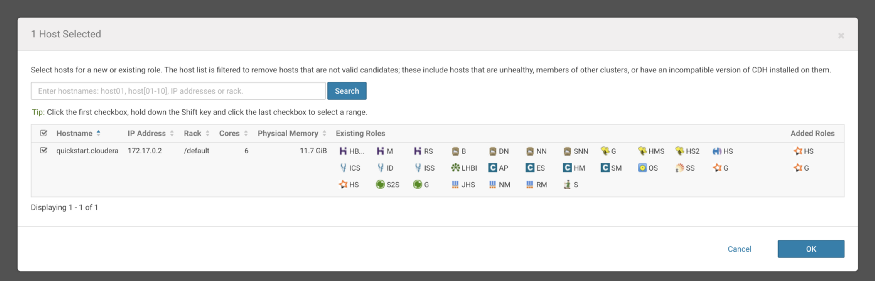
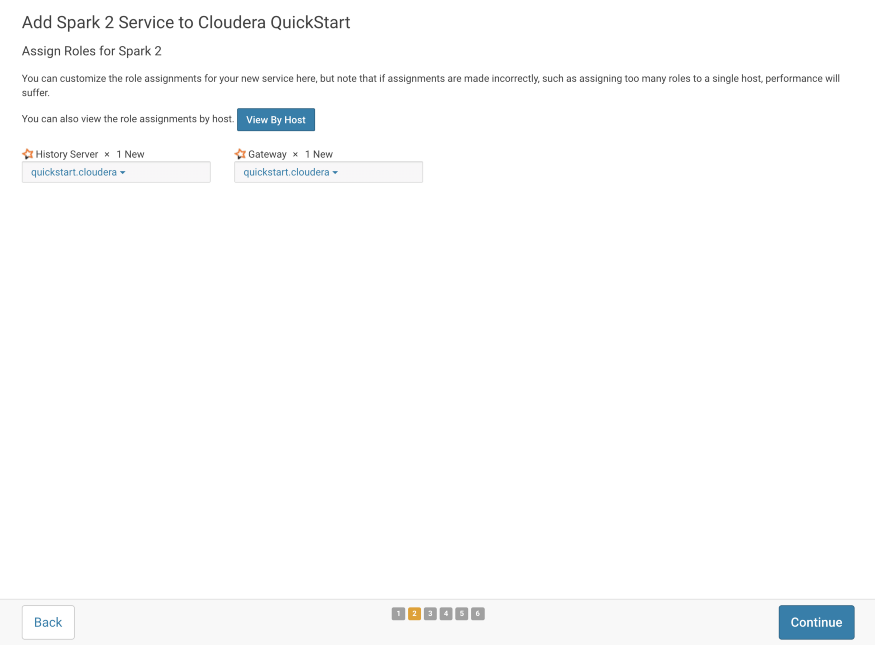
To run the History Server and Gateway services, we have to select the available host.
I’m running the single-node Cloudera Cluster and I have selected the same available host- “quickstart.cloudera”.
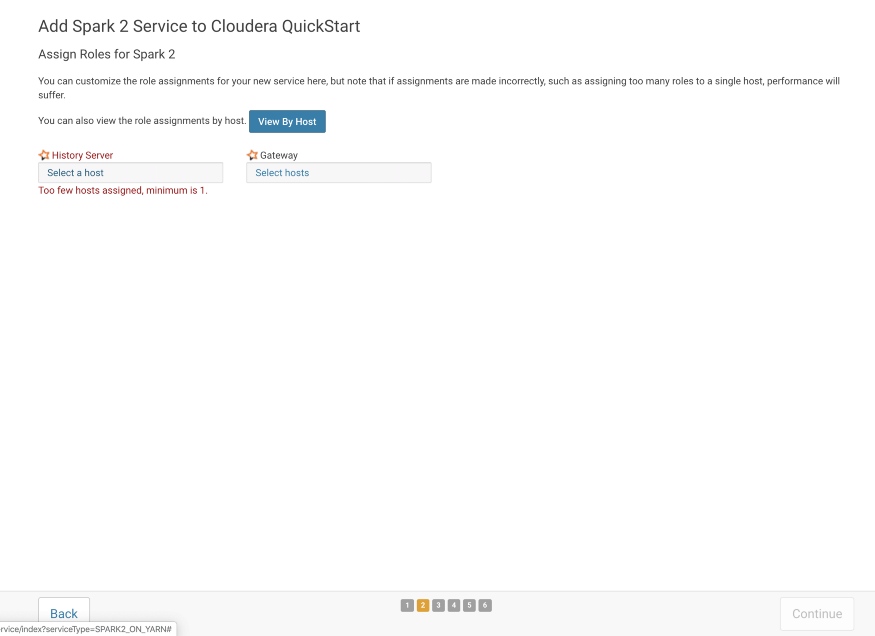
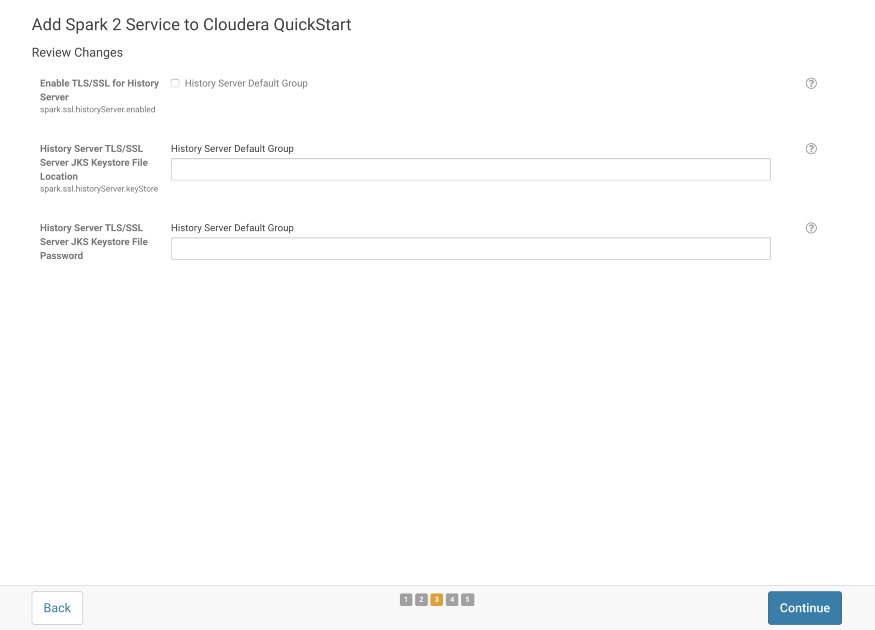
Leave this configuration as it is.
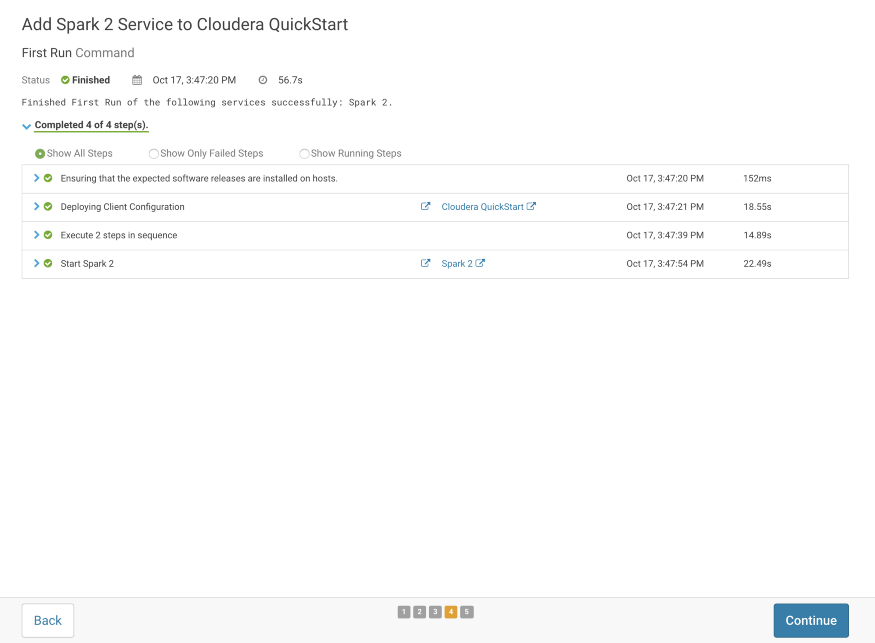
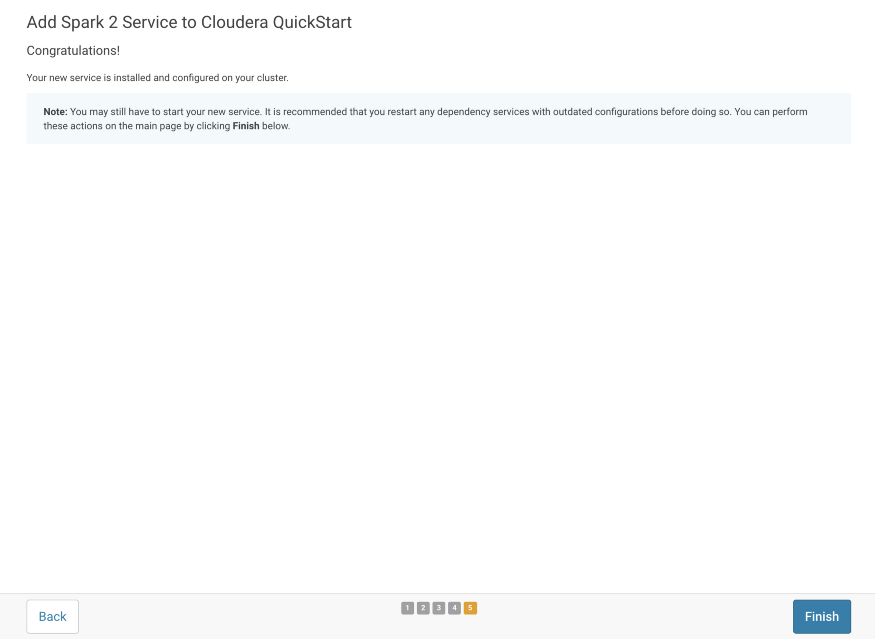
After performing all these steps, you can see that the Spark2 Services is running with the other Hadoop services in the Cloudera Cluster.
Now, let’s Start Spark-shell to verify that our spark2 service is ready for hands-on exercises. Open the terminal → Type “spark2-shell”
spark2-shell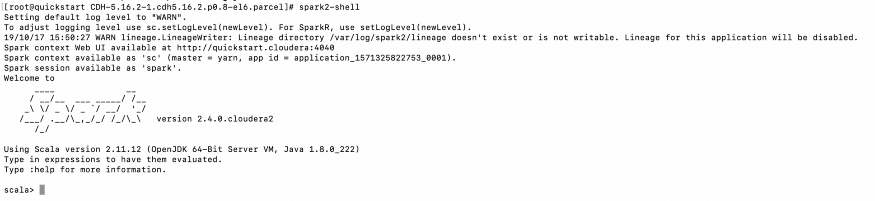
Also, check out our blog "Installation guide for upgrading CDH and Cloudera Manager" here. To get the best data engineering solutions for your business, reach out to us at Clairvoyant.
::BONUS::
CDS powered by Apache Spark version and Supported CDH versions